20+ Years Experience
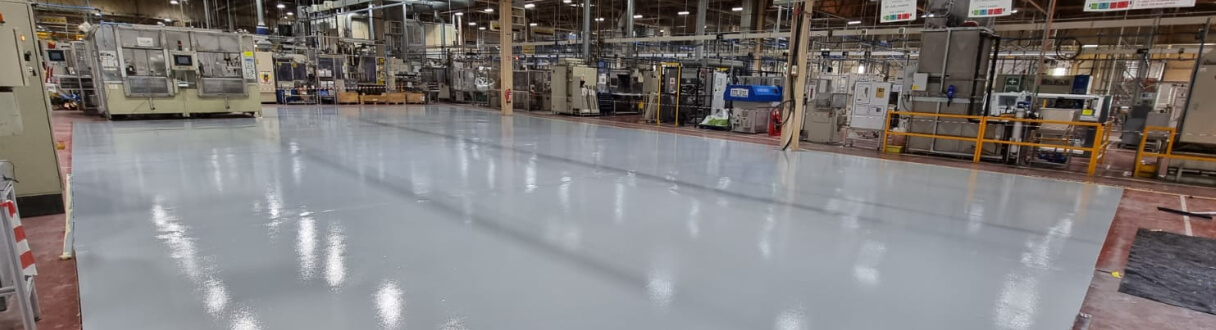
Specialist Factory Flooring
Enquire Today For A Free No Obligation Quote
html
DIY resin flooring installation offers a cost-effective and customizable solution for homeowners looking to update their floors. With its durability and longevity, resin flooring has become a popular choice for both residential and commercial spaces. By following the right techniques and using the appropriate materials, you can achieve a high-quality resin floor that enhances the aesthetic appeal of any room. Before you begin the installation process, it’s important to choose the right resin flooring material, such as epoxy resin or polyurethane resin, based on your specific needs and preferences. Gathering the necessary tools and materials and properly preparing the surface are crucial steps for a successful resin flooring installation. In this article, we will walk you through the process of DIY resin flooring installation, providing you with tips and tricks to ensure a smooth and professional-looking finish.
Discover the incredible advantages of DIY resin flooring that extend beyond its aesthetically pleasing appearance. Not only is it a cost-effective option, but it also provides limitless customization possibilities. Additionally, DIY resin flooring is known for its exceptional durability and long lifespan. This section will delve into why homeowners choose DIY resin flooring to transform their living spaces. Bid farewell to ordinary floors and welcome a realm of endless possibilities with resin flooring.
DIY resin flooring is an affordable solution for those looking to upgrade their floors without spending a fortune. Here are some key advantages:
By selecting the appropriate resin flooring material and following the correct installation steps, you can achieve professional-looking results that are budget-friendly.
|
Customization options are a significant advantage when it comes to DIY resin flooring. Consider the following options:
Did you know that resin flooring can also be used to create stunning 3D effects, giving your space a truly remarkable and artistic touch? |
Durability and longevity are important factors to consider when choosing to install resin flooring yourself. Here are some key points to keep in mind:
Choosing the Right Resin Flooring Material
When it comes to DIY resin flooring installation, it is crucial to choose the right resin flooring material. This part will discuss the options available to you: epoxy resin and polyurethane resin. Each sub-section will reveal the unique qualities and considerations associated with these materials, helping you make an informed decision. Let’s explore which resin flooring material is the perfect fit for your project, ensuring a successful and long-lasting installation.
Epoxy resin is a popular material for DIY resin flooring projects in the UK due to its durability and versatility. This type of resin offers a seamless and glossy finish, making it ideal for high-traffic areas like garages or kitchens. A true story about the benefits of epoxy resin is a homeowner who transformed their dull concrete basement floor into a stunning epoxy resin masterpiece. With proper surface preparation, following the manufacturer’s instructions, working in small sections, using protective gear, and taking care of cleanup, the homeowner achieved a successful DIY epoxy resin flooring installation that added beauty and value to their home.
Polyurethane resin is a popular choice for DIY resin flooring projects because of its durability and versatility. It provides a strong protective coating that can withstand heavy traffic and resist stains and chemicals. Polyurethane resin is also known for its flexibility, making it suitable for areas with temperature fluctuations or substrate movement. It offers excellent UV resistance, preventing yellowing or discolouration over time. When using polyurethane resin for your DIY flooring installation, it is important to follow the manufacturer’s instructions for proper mixing, priming, and application. Taking proper care of surface preparation and using protective gear will ensure a successful and long-lasting result.
Having the right tools and materials is crucial for a successful outcome when embarking on a DIY resin flooring installation project. Here are the tools and materials required for DIY resin flooring:
Remember to follow the manufacturer’s instructions and take proper safety precautions while working with resin. With the right tools and materials, you can achieve a professional-looking DIY resin flooring that will enhance the aesthetic appeal of your space.
Get ready to transform your floors with a DIY resin flooring installation! This section will focus on preparing the surface for a flawless finish. We will delve into the details of cleaning and degreasing, ensuring a smooth foundation for your resin flooring. We will also explore the necessary steps to repair cracks and imperfections, allowing you to achieve a stunning and durable result. Prepare your tools as we embark on this exciting journey to revitalize your floors!
Cleaning and degreasing the surface is an essential step in preparing for DIY resin flooring installation.
To ensure a successful resin flooring installation:
When it comes to repairing cracks and imperfections in DIY resin flooring, following these steps can ensure a successful outcome:
Following these steps will help ensure that the repaired areas blend seamlessly with the rest of the resin flooring, leaving you with a smooth and flawless finish.
Ready to give your floors a sleek and modern look? This section will guide you through the process of applying resin flooring. We will cover everything from mixing the resin and hardener to achieving a bubble-free finish. So gather your materials and let’s get started on giving your space a fresh and polished appearance that is sure to impress. Let’s begin!
Mixing resin and hardener is a crucial step in DIY resin flooring installation. Here is a step-by-step guide to ensure a successful mixture:
By following these steps, you can achieve a properly mixed resin and hardener mixture, setting the foundation for a successful DIY resin flooring installation.
To ensure a successful DIY resin flooring installation, it is crucial to prime the surface. Here is a step-by-step guide to priming the surface for resin flooring:
Priming the surface is essential as it improves adhesion between the resin and the substrate, enhances durability, and prevents moisture-related issues. When selecting and applying the primer, follow the manufacturer’s instructions to ensure proper coverage and drying time. Properly priming the surface will create a strong foundation for the resin flooring, resulting in a seamless and long-lasting finish.
Pouring and spreading the resin for DIY resin flooring involves several important steps. Here is a list of the steps involved:
By following these steps, you can achieve a smooth and professional-looking resin flooring surface for your DIY project. Remember to work in small sections and wear protective gear throughout the process.
When it comes to DIY resin flooring installation, removing bubbles is a crucial step to ensure a smooth and flawless finish. Here are the steps to effectively remove bubbles in resin flooring:
Resin flooring has been used for many years in commercial and industrial settings due to its durability and longevity. With the rise in popularity of DIY projects, more homeowners are now opting for resin flooring installations. By following the proper steps, including removing bubbles, DIY enthusiasts can achieve professional-looking resin floors in their homes.
Curing and finishing the resin flooring is crucial for a successful DIY installation. Follow these steps to achieve a professional-looking result:
For optimal results, consider the following suggestions:
Looking to undertake a DIY resin flooring installation? You’re in the right place! In the following section, we will explore some crucial tips and tricks to guarantee a successful DIY resin flooring installation. These tips include proper surface preparation, adherence to the manufacturer’s instructions, working in small sections, and wearing protective gear. Additionally, we will highlight the significance of cleanup. Let’s begin your journey towards a successful DIY resin flooring installation!
Proper surface preparation is essential for a successful DIY resin flooring installation. To achieve a smooth and long-lasting finish, follow these steps:
Thoroughly clean and degrease the surface to remove any dirt, dust, or grease.
Repair any cracks or imperfections in the surface using appropriate patching materials.
Remember these additional suggestions for a successful DIY resin flooring installation:
Always follow the manufacturer’s instructions for the specific resin flooring material you are using.
Work in small sections to ensure proper coverage and avoid the resin drying before you finish spreading it.
Use protective gear, such as gloves and goggles, to protect yourself during the installation process.
Immediately clean up any spills or excess resin after completing the installation to prevent it from hardening and causing difficulties later on.
Following the manufacturer’s instructions is crucial for a successful DIY resin flooring installation. Here are the steps to ensure you are following the instructions properly:
By carefully following the manufacturer’s instructions, you can ensure a successful DIY resin flooring installation.
When working on a DIY resin flooring installation, it is important to work in small sections to ensure proper application and a smooth finish. Here are some steps to follow when working in small sections:
Prepare the surface by cleaning and degreasing it thoroughly.
Repair any cracks or imperfections on the surface.
Mix the resin and hardener according to the manufacturer’s instructions.
Prime the surface with a primer specifically designed for resin flooring.
Pour and spread the resin in a small section of the floor.
Use a squeegee or roller to evenly distribute the resin.
Remove any air bubbles by using a blowtorch or heat gun carefully.
Allow the resin to cure according to the recommended time.
Repeat the process in small sections until the entire floor is covered.
Working in small sections helps to ensure that the resin is applied evenly and allows for better control over the process.
When carrying out a DIY resin flooring installation, it is essential to prioritize safety by using appropriate protective gear. Here are some steps to follow when using protective gear:
Assess the necessary equipment: Consider using safety goggles, gloves, a dust mask, and protective clothing.
Choose high-quality gear: Ensure that the protective gear is durable and fits properly.
Protect the eyes: Wear safety goggles to shield your eyes from chemicals and debris.
Shield the hands: Use gloves designed for chemical resistance to protect your hands from contact with resin and other substances.
Filter the air: Wear a dust mask to prevent inhalation of harmful fumes or particles.
By following these steps and taking precautionary measures, you can ensure a safe DIY resin flooring installation process.
Having access to additional resources and references can be extremely helpful when installing a DIY resin flooring. Below is a table featuring some reliable sources that you can consult:
| Source | Description |
| Resin Flooring Magazine | A comprehensive publication covering all aspects of resin flooring installation and maintenance. |
| Manufacturer Websites | Visit the websites of resin flooring manufacturers to get detailed product information, installation guides, and troubleshooting tips. |
| Online Forums and Communities | Participate in online forums and communities where DIY enthusiasts and professionals share their experiences and knowledge. |
| YouTube Tutorials | Watch step-by-step video tutorials from reputable DIY channels to learn the best practices and techniques for resin flooring installation. |
A two-part system in epoxy flooring refers to the use of a resin and a hardener that are mixed together to create a chemical-resistant surface. This system allows for a stronger and more durable flooring solution.
Proper preparation is crucial for a successful epoxy floor installation. It involves cleaning, repairing, and shot blasting the concrete floor to ensure a strong bond. Additionally, moisture tests, filling cracks, and applying a self-leveling concrete primer are important steps in the preparation process.
To fill cracks in a concrete floor before installing epoxy flooring, you can use a resin-based patcher paste. Apply the paste to the cracks and smooth it out to create a level surface. This will help prevent any imperfections in the final epoxy floor.
Yes, you can add anti-skid additives to epoxy flooring to improve slip resistance. These additives create a textured surface that enhances traction and reduces the risk of slips and falls. It is recommended, especially in high-traffic areas or where spills are likely to occur.
While epoxy flooring installation may require some basic DIY skills, it is suitable for both beginners and experienced individuals. Following the manufacturer’s instructions, watching installation guides, and gathering the necessary tools in advance can help you achieve great results even if you are a first-time installer.
For further assistance and advice on installing a resin floor, you can contact Everlast Epoxy’s team at (800) 708 9870. They have a global team of experts who can provide guidance and answer any questions you may have about DIY resin flooring installation.
We Aim To Reply To All Enquiries With-in 24-Hours