20+ Years Experience
Specialist Factory Flooring
Enquire Today For A Free No Obligation Quote
Repairing Chips and Cracks in Your Polyurethane Resin Flooring
Polyurethane resin flooring is a popular choice for various commercial and industrial spaces due to its durability, chemical resistance, and aesthetic appeal. However, over time, chips and cracks can develop, compromising the integrity of the flooring. Recognising the importance of addressing these issues promptly, it is essential to understand the causes and effects of chips and cracks in polyurethane resin flooring.
Causes of chips and cracks can range from heavy impacts, thermal changes, or improper installation. These damages can affect not only the appearance of the flooring but also its functionality, leading to potential safety hazards and further deterioration.
To ensure the longevity and performance of your polyurethane resin flooring, it is crucial to repair chips and cracks promptly. Repairing these damages prevents further deterioration, such as the spreading of cracks or water seepage, which can lead to more significant problems and costly repairs. By repairing chips and cracks, you can maintain a safe environment for employees and visitors, minimising the risk of accidents or injuries.
To repair chips and cracks in your polyurethane resin flooring, you will need specific tools and materials, including cleaning supplies, primer, repair materials such as polyurethane filler, and a protective coating. Following a step-by-step guide, you can effectively repair the damaged area, ensuring a seamless and strong finish.
In addition to repairing damages, proper maintenance is crucial for the longevity of polyurethane resin flooring. Regular cleaning, avoiding harsh chemicals, and promptly addressing any minor damages can help preserve the quality and appearance of the flooring.
By understanding the importance of repairing chips and cracks in your polyurethane resin flooring and following the necessary steps, you can maintain a safe and visually appealing space that will last for years to come.
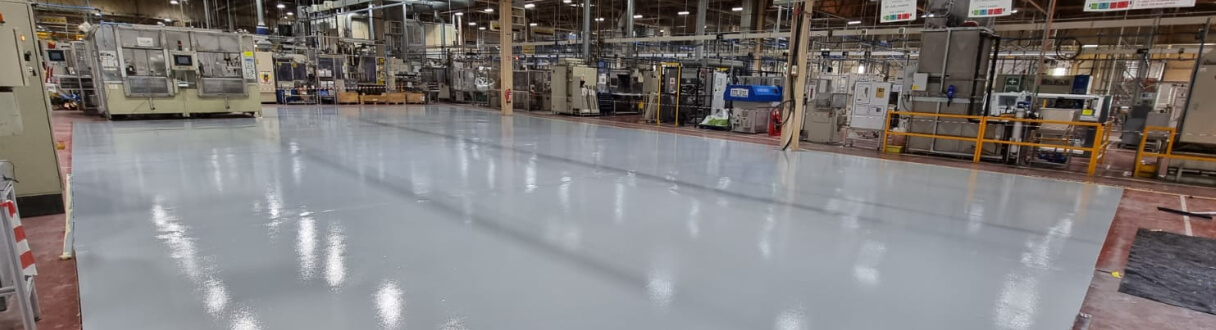
Polyurethane resin flooring is a type of flooring made from durable and versatile polyurethane resin. It is commonly used in commercial, industrial, and residential settings due to its numerous benefits. It offers high resistance to chemicals, abrasions, and impacts, making it suitable for areas with heavy foot traffic or machinery. Polyurethane resin flooring is also known for its seamless and easy-to-clean surface, making it hygienic and low maintenance. It is available in various colours and finishes, allowing for customisation to suit different aesthetic preferences. In summary, polyurethane resin flooring is a reliable and functional flooring option for a wide range of applications.
True history: Polyurethane resin flooring was first developed in the mid-20th century as a solution for industrial environments. It gained popularity due to its exceptional durability and performance. Over time, its benefits were recognised in other sectors, leading to increased usage in commercial and residential spaces. Today, polyurethane resin flooring continues to evolve with advancements in technology, offering even more options for customisation and enhanced performance.
Choosing polyurethane resin flooring offers several benefits for commercial and industrial spaces. Polyurethane resin flooring is highly durable and resistant to scratches, impacts, and chemicals, making it ideal for high-traffic areas. Additionally, its seamless and non-porous surface prevents the growth of bacteria and fungi, ensuring a hygienic environment. This flooring option also provides excellent slip resistance, reducing the risk of accidents in the workplace. Furthermore, polyurethane resin flooring is easy to clean and maintain, requiring minimal efforts and costs. With a wide range of colors and finishes available, it allows for customizable designs that complement any space.
Understanding Chips and Cracks in Polyurethane Resin Flooring
When maintaining your polyurethane resin flooring, it is important to have a good understanding of chips and cracks. In this section, we will explore the causes and effects of these imperfections. Learn about what causes chips and cracks in your flooring and how they can affect its durability and appearance. Rest assured, we have all the information you need to address this common issue.
Chips and cracks in polyurethane resin flooring can occur due to various factors. One common cause is heavy impacts from dropped objects or equipment. Another cause is thermal stress, which occurs when the flooring expands and contracts due to temperature changes. Improper installation or inadequate substrate preparation can also lead to chips and cracks. It is important to address these issues promptly because chips and cracks can compromise the integrity of the flooring and create safety hazards. By understanding the causes and taking preventive measures, such as using protective coatings and ensuring proper installation, you can minimize the risk of chips and cracks in your polyurethane resin flooring.
Pro-tip: Regularly inspecting your flooring and addressing any issues promptly can help prevent the formation of chips and cracks.
The effects of chips and cracks in polyurethane resin flooring can have negative impacts on both the appearance and performance of the floor. Here are some key effects that can occur:
| 1. Safety hazards | Chips and cracks can create uneven surfaces, increasing the risk of trips and falls. |
| 2. Structural damage | Chips and cracks can lead to further deterioration of the flooring, compromising its integrity. |
| 3. Moisture penetration | Chips and cracks provide entry points for moisture, which can cause damage to the underlying layers of the flooring and lead to mould or mildew growth. |
| 4. Dirt and debris accumulation | Chips and cracks can trap dirt and debris, making the floor difficult to clean and maintain. |
| 5. Aesthetics | Chips and cracks can affect the overall appearance of the flooring, diminishing its visual appeal. |
To ensure the longevity and performance of your polyurethane resin flooring, it is important to address chips and cracks promptly. Regular maintenance and repairs are necessary to prevent further damage and maintain a safe and attractive floor surface.
In history, the effects of chips and cracks in ancient Roman mosaic floors were a concern. They understood the importance of proper repair and maintenance to preserve the beauty and functionality of their intricate flooring designs.
Repairing Chips and Cracks in Your Polyurethane Resin Flooring
Importance of Repairing Chips and Cracks
Don’t ignore the small chips and cracks in your polyurethane resin flooring! It is crucial to repair them promptly. In this section, we will explore how these seemingly minor imperfections can cause further damage and compromise safety. Discover the key reasons why addressing these issues promptly is crucial for maintaining the integrity and longevity of your flooring. So, grab your tools and let’s dive into the world of chip and crack repairs!
To prevent further damage to polyurethane resin flooring, it is important to follow these steps:
Regular Inspections: Conduct regular inspections of the flooring to identify any chips or cracks early on.
Quick Repair: Repair any chips or cracks immediately to prevent them from becoming larger or spreading.
Proper Cleaning: Clean the flooring regularly using appropriate cleaning methods and products to prevent dirt and debris from causing additional damage.
Use Protective Mats: Place protective mats in high-traffic areas or areas prone to damage to prevent direct impact on the flooring.
Avoid Harsh Chemicals: Avoid using harsh chemicals or cleaning agents that may damage or deteriorate the resin flooring.
Regular Maintenance: Implement a regular maintenance routine that includes cleaning and inspecting the flooring to identify and address any potential issues.
Ensuring safety is of utmost importance when it comes to repairing chips and cracks in polyurethane resin flooring. Follow these steps to maintain a safe environment:
Polyurethane resin flooring was first developed in the 1950s for industrial applications, providing a durable and long-lasting flooring solution. Over the years, advancements in technology and safety standards have made polyurethane resin flooring a popular choice in various industries, including healthcare, education, and manufacturing. Its seamless and chemical-resistant properties make it an ideal option for environments where safety and hygiene are paramount.
Having the right tools and materials is crucial when it comes to repairing chips and cracks in your polyurethane resin flooring. In this section, we will discuss the essential items required to effectively tackle these repairs. We will cover the importance of proper cleaning and preparation, as well as the selection of repair materials. Our goal is to provide you with the knowledge needed to restore the integrity and beauty of your flooring. So, let’s roll up our sleeves and explore the key elements for a successful repair job.
The first step in repairing chips and cracks in polyurethane resin flooring is cleaning and preparation. To ensure a successful repair, follow these steps:
Pro-tip: To prevent chips and cracks from occurring in the first place, make sure to regularly clean and maintain your polyurethane resin flooring. This will extend the lifespan of your flooring and keep it looking its best.
When it comes to repairing chips and cracks in polyurethane resin flooring, it is crucial to have the right repair materials. Here are some essential items you will need:
By using these repair materials, you can effectively restore the integrity of your polyurethane resin flooring and maintain its appearance. Remember to follow the step-by-step guide provided in the article to ensure a successful repair. Regular maintenance and prompt repair of any chips or cracks will help prolong the lifespan of your flooring.
Are you looking to repair the chips and cracks in your polyurethane resin flooring? If so, our step-by-step guide is here to help. We will take you through the entire process, starting from cleaning and preparing the damaged area, to applying the perfect primer, filling the chips or cracks, and smoothing the surface. Additionally, we will provide expert tips on allowing enough time for proper curing and applying a protective coating for long-lasting results. With our foolproof techniques, you can say goodbye to flooring flaws.
To effectively repair chips and cracks in polyurethane resin flooring, it is important to thoroughly clean and prepare the damaged area. Here are the steps to follow:
Following these steps will ensure that the damaged area is properly cleaned and prepared, allowing for a successful repair of chips and cracks in polyurethane resin flooring.
Applying primer is an essential step in the process of repairing chips and cracks in polyurethane resin flooring. Here is a step-by-step guide to help you through the process:
By following these steps and applying the primer correctly, you can effectively repair chips and cracks in your polyurethane resin flooring.
To repair a chip or crack in polyurethane resin flooring, follow these steps:
True story: A professional flooring contractor had a client who had a chip in their polyurethane resin flooring. By following these steps, the contractor successfully repaired the damage, restoring the floor’s appearance and preventing further deterioration. The client was thrilled with the outcome and praised the contractor for their expertise and attention to detail.
To achieve a smooth and level surface when repairing chips and cracks in polyurethane resin flooring, follow these steps:
Following these steps will help you achieve a seamless and level surface when repairing chips and cracks in your polyurethane resin flooring.
Allowing sufficient time for curing is crucial when repairing chips and cracks in polyurethane resin flooring. Here are the steps to follow:
Proper curing ensures the repaired area is strong and resistant to future damage, maintaining the integrity of your polyurethane resin flooring.
The concept of using polyurethane resin for flooring originated in the 1950s as a solution for industrial and commercial spaces. Over time, advancements in technology and formulations have led to the development of highly durable and versatile polyurethane resin flooring systems. Today, these floors are widely used in a variety of settings, including warehouses, food processing plants, hospitals, and other high-traffic areas, offering excellent chemical resistance, impact resistance, and easy maintenance.
To apply a protective coating on polyurethane resin flooring, follow these steps:
Remember to follow the manufacturer’s instructions and recommendations for the specific protective coating you are using. Regularly clean and maintain the flooring to ensure its longevity and durability.
To maintain polyurethane resin flooring, follow these tips:
1. Regular Cleaning: Remove debris and dirt by sweeping or vacuuming the floor. Clean any stains using a mild detergent and water solution.
2. Avoid Harsh Chemicals: Utilise cleaning products specifically designed for polyurethane resin flooring. Steer clear of harsh chemicals that could harm the surface.
3. Prevent Scratches: Place floor mats at entrances to prevent dirt from being tracked in. Use furniture pads or felt protectors on furniture legs to avoid scratches.
4. Promptly Address Spills: Immediately wipe up any spills to prevent staining or damage to the flooring.
5. Prevent UV Damage: During peak sunlight hours, keep curtains or blinds closed to protect the resin flooring from fading or discolouration.
6. Regular Maintenance: Schedule routine maintenance, such as deep cleaning or reapplication of protective coatings, to maintain the flooring’s appearance.
Following these tips will help prolong the lifespan and preserve the appearance of your polyurethane resin flooring.
To repair minor chips or cracks in your epoxy floor at home, you can apply a compound to the damaged areas and smooth the surface with a trowel. Make sure to let the repairs cure for at least 60 days before applying a new coat of epoxy for optimal results.
For major repairs on epoxy floors in commercial properties, it is recommended to resurface the entire floor instead of just patching the cracks. This ensures a seamless appearance and durability. It is advisable to hire a professional for such extensive repairs to achieve the best results.
Before repairing your epoxy floor, make sure to sweep the area and remove any oil or grease using a grease-cutting detergent. This will ensure a clean and properly bonded substrate for the repair materials.
To fix surface cracks in your epoxy floor, first remove any loose particles and coating from the cracks and joints. Then, make the cracks and joints sound by grinding off the existing coating. Apply a primer and finishing coat to the repaired cracks for a seamless and visually pleasing finish.
For dynamic cracks originating from the concrete substrate in your epoxy floor, it is necessary to remove all weak parts from the cracks and joints. Enlarge the cracks if needed and clean them thoroughly. “Stitch” or make cross cuts along the cracks and add steel bars for reinforcement. Finally, grind the surface flat and apply a finishing coat.
To repair holes and joint edges with higher thickness in your epoxy floor, use heavy-duty epoxy mortars. Apply the mortar to the damaged areas and ensure an even layer. Once the repair has cured, sand the surface and apply a finishing coat to achieve a smooth and seamless finish.
We Aim To Reply To All Enquiries With-in 24-Hours