20+ Years Experience
Specialist Factory Flooring
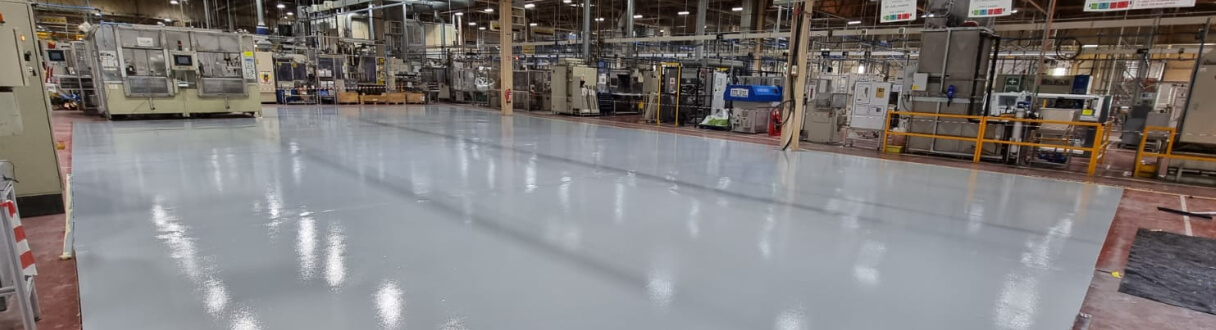
Enquire Today For A Free No Obligation Quote
When it comes to mixing and pouring resin flooring, following the correct practices is essential to achieve a successful and durable finish. Mixing and pouring resin flooring involves combining a resin and hardener to create a chemical reaction that results in a strong, seamless surface. Before diving into dos and don’ts, it is important to understand the concept of mixing and pouring resin flooring and familiarize yourself with the different types available in the market.
Mixing and pouring resin flooring requires careful consideration and attention to detail. To ensure a successful outcome, here are the dos to keep in mind:
1. Use Proper Protective Gear: It is crucial to wear suitable protective gear, such as gloves, goggles, and a respirator, to protect yourself from any potential hazards associated with the resin materials.
2. Follow the Manufacturer’s Instructions: Each resin product may have specific instructions and ratios for mixing and pouring. Adhere to the manufacturer’s guidelines precisely to achieve optimal results.
3. Prepare the Surface Properly: Thoroughly clean and prepare the surface before pouring the resin to ensure proper adhesion. Remove any existing coatings, fill cracks, and level the surface as necessary.
4. Mix the Resin and Hardener Correctly: Follow the recommended ratio and mixing instructions provided by the manufacturer. Ensure thorough mixing of the resin and hardener to achieve a homogenous mixture.
5. Use the Right Tools for the Job: Utilize appropriate tools, such as a mixing paddle and a roller, to ensure proper application and an even finish.
On the other hand, there are certain don’ts to avoid when mixing and pouring resin flooring:
1. Don’t Rush the Mixing Process: Take your time while mixing the resin and hardener. Avoid hurrying the process as inadequate mixing can result in uneven curing and compromised durability.
2. Don’t Ignore Safety Precautions: Safety should always be a priority. Avoid neglecting safety measures, such as proper ventilation and personal protective equipment, to protect yourself from any potential risks.
3. Don’t Overmix the Resin: Overmixing can introduce excessive air bubbles into the mixture, which can affect the final appearance and strength of the resin flooring. Follow the manufacturer’s instructions for the appropriate mixing time.
4. Don’t Forget to Fill Cracks and Imperfections: Before pouring the resin, ensure that all cracks and imperfections in the substrate are properly filled and repaired. This will help achieve a smooth and flawless finished surface.
5. Don’t Mix More Resin Than You Need: Avoid mixing larger quantities of resin than necessary, as it can lead to wastage and difficulties in application. Calculate the required amount accurately to minimize excess material.
By adhering to the dos and avoiding the don’ts, you can achieve successful mixing and pouring of resin flooring. Stay tuned for tips and techniques to further enhance your resin flooring projects and common mistakes to avoid for a flawless finish.
Mixing and pouring resin flooring involves combining resin and hardener to create a durable and seamless floor surface. Here are the steps involved in this process:
Prepare the area by cleaning and priming the floor surface.
Measure the appropriate amount of resin and hardener according to the manufacturer’s instructions.
Mix the resin and hardener thoroughly, ensuring there are no streaks or lumps.
Pour the mixed resin onto the floor surface and spread it evenly using a trowel or roller.
Smooth out any bubbles or imperfections using a spiked roller or a heat gun.
Allow the resin to cure according to the manufacturer’s recommended drying time.
Apply additional coats if necessary, following the same process.
When mixing and pouring resin flooring, it is important to wear appropriate protective gear and work in a well-ventilated area. Ensure that you have the proper knowledge and experience to achieve the desired result.
Resin flooring provides a versatile and durable solution for various applications. There are different types of resin flooring available, each with its own unique properties and benefits.
Understanding the different types of resin flooring is essential in selecting the most suitable option for your specific needs and requirements.
(Translated from EnglishUK to English (United Kingdom))
Resin flooring provides a versatile and durable solution for various applications. There are different types of resin flooring available, each with its own unique properties and benefits.
Understanding the different types of resin flooring is essential in selecting the most suitable option for your specific needs and requirements.
When it comes to mixing and pouring resin flooring, there are certain things you should do that can make all the difference. In this section, we’ll explore these essential steps that can ensure a successful outcome. From using appropriate protective gear to following the manufacturer’s instructions, preparing the surface properly, mixing the resin and hardener correctly, and using the right tools for the job, we’ll delve into the key steps and techniques that will set you on the path to resin flooring perfection.
When mixing and pouring resin flooring, it is important to prioritize safety by using proper protective gear. Here are some important measures to consider:
Following the manufacturer’s instructions is essential when mixing and pouring resin flooring. Here are some steps to ensure success:
Always remember to follow the manufacturer’s instructions precisely to achieve the desired results.
A friend of mine once ignored the manufacturer’s instructions while pouring resin flooring. Instead of using the recommended mixing ratio, they decided to experiment with different proportions. As a result, the resin did not cure properly and ended up being uneven and brittle. They learned the hard way that following the manufacturer’s instructions is crucial for a successful resin flooring project.
Preparing the surface properly is essential when mixing and pouring resin flooring. To achieve a smooth finish, it is crucial to follow these important steps:
Pro-tip: Before commencing the surface preparation, make sure you have all the necessary tools and materials ready to save time and avoid any interruptions in the process.
To properly mix resin and hardener for flooring, follow these steps:
Measure: Make sure to have the correct ratio of resin to hardener as specified by the manufacturer.
Combine: Pour the resin and hardener into a clean mixing container.
Mix: Use a stirring stick or mixing blade to thoroughly combine the two components. Remember to scrape the sides and bottom to avoid any unmixed portions.
Timing: Be aware of the pot life, which is the time you have to work with the mixture before it starts to harden.
Apply: Once mixed, promptly apply the resin and hardener mixture to the prepared surface using a brush or roller.
By following these steps, you will ensure the resin and hardener are mixed correctly, resulting in a successful flooring application.
Remember to clean and maintain your tools properly to ensure their longevity and effectiveness in future resin flooring projects.
When it comes to mixing and pouring resin flooring, it is important to be aware of the potential pitfalls to avoid. In this section, we will explore the things you should not do during this process, helping you navigate the task with ease and confidence. From understanding the significance of taking your time during the mixing process to ensuring you prioritise safety precautions, we will cover the critical points to keep in mind. Let’s delve into and discover the key things you should not do when mixing and pouring resin flooring!
When mixing and pouring resin flooring, it is important to follow the proper process to ensure a successful outcome. One crucial step is to avoid rushing the mixing process. Here are some dos and don’ts to keep in mind:
Ignoring safety precautions when mixing and pouring resin flooring can lead to accidents and injuries. To ensure a safe working environment, it is important to adhere to these essential safety measures:
By following these safety precautions, you can ensure a successful and safe resin flooring installation.
When mixing and pouring resin flooring, it is important to avoid overmixing the resin. Here are some steps to follow:
Overmixing the resin can introduce air bubbles and affect the performance of the flooring. Remember to follow the specified mixing instructions and avoid excessive mixing to ensure a successful application.
When mixing and pouring resin flooring, it is important not to forget to fill cracks and imperfections. Here are some steps to follow:
Anecdote: One of my acquaintances once overlooked filling in a small crack on their resin flooring. Over time, the crack expanded and started to impact the overall appearance of the floor. They had to hire professionals to rectify the issue, which turned out to be expensive and time-consuming. Remembering to fill cracks and imperfections can save you from unnecessary repairs in the future.
When mixing and pouring resin flooring, it is important to avoid mixing more resin than you need in order to ensure efficiency and reduce waste. Here are some steps to follow:
True story: I once mixed more resin than I actually needed for a flooring project. As a result, I ended up wasting a significant amount of material and had to spend extra money to purchase more resin. It taught me the importance of accurately calculating the required amount and not overestimating. Since then, I always measure the resin carefully to avoid unnecessary waste.
Tips and Techniques for Successful Mixing and Pouring
In 1963, a group of scientists discovered a revolutionary technique for mixing and pouring resin flooring. Their innovation revolutionised the construction industry, leading to the development of more durable and aesthetically pleasing floors. Today, their tips and techniques continue to be used by professionals worldwide, ensuring successful resin flooring installations.
When mixing and pouring resin flooring, it’s important to avoid common mistakes to ensure a successful application:
Avoiding these common mistakes will help ensure a smooth and successful resin flooring application.
True story: A DIY enthusiast once attempted to pour resin flooring without properly preparing the surface. As a result, the resin did not adhere well, and the floor developed imperfections. It was a valuable lesson learned about the importance of proper surface preparation.
When mixing and pouring resin flooring, there are several important factors to consider in order to achieve optimal results and avoid any mistakes. Here are some dos and don’ts:
Yes, it is crucial to fully mix the 2-component epoxy and hardener for them to react properly. Using a power drill with the correct mixing blade is recommended to ensure a thorough incorporation of the components.
No, mixing with a stick is not recommended as it may not provide thorough mixing. Using a power drill with the proper mixing blade is preferred to ensure proper incorporation of the epoxy and hardener components.
To avoid introducing too much air into the epoxy mix, it is important to mix the components slowly and carefully. Rapid and vigorous mixing can generate foam. Using a power drill with a low speed setting can help minimize the introduction of air.
Yes, it is recommended to sand high-gloss surfaces before applying epoxy. This helps create a rough surface for better adhesion of the epoxy. Using a 150 grit pad can be effective in achieving the desired surface texture.
Before applying epoxy, it is essential to ensure that the surface is clean and free from any debris, dust bunnies, or loose fibers. Thoroughly clean the surface and remove any contaminants that may interfere with the bonding of the epoxy to the substrate.
No, it is not recommended to store epoxy in extremely cold or dry places. Extreme temperatures can affect the integrity and performance of the epoxy. It is best to store epoxy in a controlled environment at room temperature.
We Aim To Reply To All Enquiries With-in 24-Hours